In each of your blog post pages Cleo automatically inject data from the author who wrote it, related comments, and articles of the same category. This all happens in the background without you having to worry about a thing. Now let's write your first post.
Before you start
Since this is the first time you write a post you need to create an "Author account" for yourself. You only have to crate an account once. You can also use one of our authors if you want to keep this step for later.
Add author account
Simply navigate to Authors > Add Author and enter the info required. Don't worry if you don't have a Biography ready yet, you can leave the field blank and fillet later.
Depending if you are using the Blog Select Stack or not your experience might slightly change writing your post. This stack is used to make your blog experience more fluid. This stack will make sure you always assign the right author to the correct blog posts. We recommend to use it.
Write your first post
Now that you have created an author account for yourself lets get some writing done!
Select Writer
Select the "Blog > Add article" tab in your admin sidebar menu. If you are using the blog select stack you will see the Select Writer box right at the top of the page where you can select the account you just created.
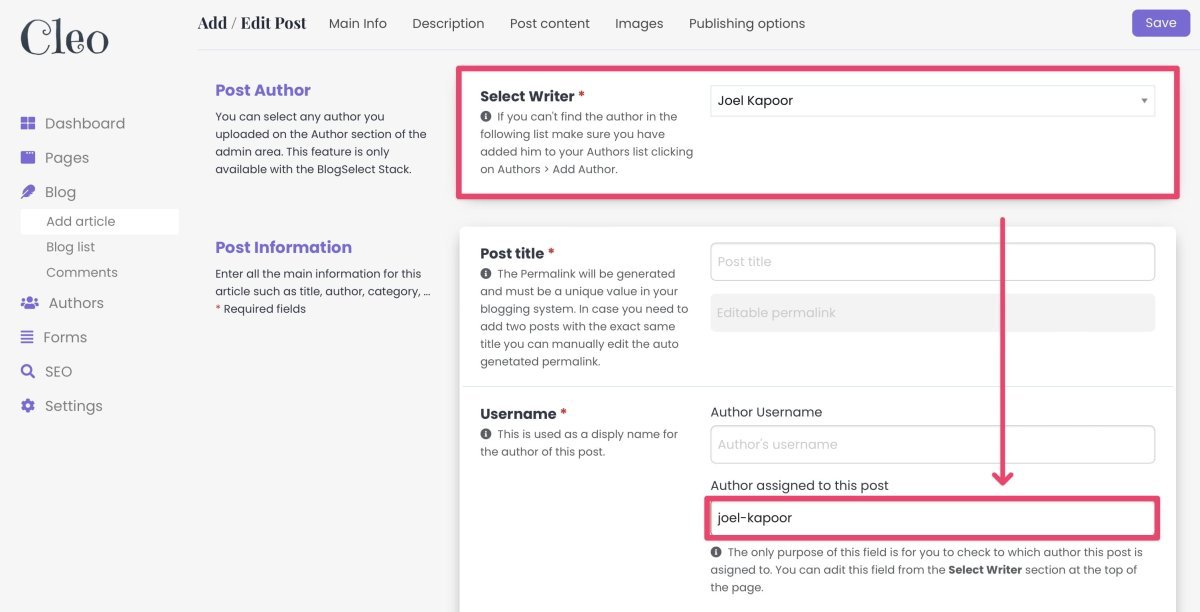
When you select an author from the Select Writer box that value will be injected also in the Author field below for you to double check at any point who is the author of a specific post.
Post Title & Permalink:
When you enter a title the permalink field will fill automatically showing you a green checkbox if everything is right or a Red Cross if that permalink is already present in the system. The permalink needs to be unique since it is used to build the URL of your posts, you can't have two pages with the same URL. In case you need to you can keep the same title and manually change the permalink.
Username for your author:
This username is going to be used to display on your live posts and SEO purposes. You can choose to retype the full name of the author or enter only his first name for a more friendly look. While blogSelect stack connects each post to the correct author automatically, If you don't use Blog Select Stack you will have to manually enter the username you assigned to author when creating the author account to connect the two.
NEED SOME FRESH AIR?
This is for you weaver
Categories & Tags:
When you enter a category you will see the system suggests to you categories that already exist in your Blog. Select the one you want or create a new one if necessary. Once you create a new category you have to assign it an image, to do that go to Pages > Blog in the admin sidebar and read the help text there.
Short Description:
This field is used both to be displayed in your blog list, page headers and SEO purposes. We suggest to keep it around the 150-160 words. This way it will always look good on your website and will perform web on search engines.
Article's main content
This is the main area of your blog post. It's divided into two section, before and after the newsletter signup form. This form is a great call to action for readers to signup to your mailing list.
You can divide your content in those two sections adding text, images, videos and files if needed.

Tip: Use the full screen icon to have a better writing experience.
Image:
Upload an image of maximum 800KB and at least 1800px wide. This will ensure that the blog posts will always look good. Use the link provided to shrink pictures if needed.
This image is used for the preview in any blog list in the website, as a banner in the blog post page and as a sharing preview for social media.
Publish settings:
In this section you have a few extra setting that come in handy when you need them. Ahead the help text to have a better understanding of what those settings do. The date picker is set to dd-mm-yyyy, but you can change that setting from Rapidweaver at any point.
Magic happens in the Background
If you are a curious kind of guy there are a couple of things running in the background even if you don't realize it.
Comment System:
In order to make the commenting system work we wrote a couple of lines of code that automatically inject the permalink into the Genre field. This will allow your post comments to always be displayed only in the post page they were wrote for. The best part is that you don't have to do anything, it all happens like magic!
BlogSelect Stack:
Thanks to the BlogSelect stack we are able to relate the author TCMS system with the blog TCMS system. But if you don't want to use Blog Select you can uncheck the relative toggle in the Settings > Optional Stacks > BlogSelect Stacks and even your admin area experience will change.